Home » Without Label » How To Put Up Crown Molding On Cabinets - How To Install Cabinet Crown Molding - YouTube : In this video we will go over some tips and tricks that might help whe.
How To Put Up Crown Molding On Cabinets - How To Install Cabinet Crown Molding - YouTube : In this video we will go over some tips and tricks that might help whe.
How To Put Up Crown Molding On Cabinets - How To Install Cabinet Crown Molding - YouTube : In this video we will go over some tips and tricks that might help whe.. I recommend at least 1 inch of space above the line to attach the molding. Titebond no run, no drip wood glue provided by titebond. Ask this old house general contractor tom silva installs crown molding on kitchen cabinets with full overlay doorssubscribe to this old house: For a long piece, you'll need some help holding it. In this video we will go over some tips and tricks that might help whe.
Cut at one mark, then move the molding along to the next mark. Secure the crown molding when installing on a wall, use the pneumatic nailer to secure the crown molding at the wall studs. House flipping brothers dave and rich show how to install kitchen cabinet crown molding and trim with tips.this video covers all aspects of cabinet molding i. Pendant light, sconce, drawer pulls, cabinet latch, faucet, paneling, flat crown, paint color the shadow line. Unless there is ample room above the doors to attach a crown molding, or if you are using a very wide crown molding, you will need to install a nailer strip to support the installation.
Adding height to the kitchen cabinets | tempting thyme from temptingthyme.com You probably forgot about that since it was two years ago. House flipping brothers dave and rich show how to install kitchen cabinet crown molding and trim with tips.this video covers all aspects of cabinet molding i. Make sure the pieces are together and in place snugly. Push the end into the corner, making the fit as tight as possible; Repeat this process with the rest of the cabinets with outside corners. To create this article, volunteer authors worked to edit and improve it over time. Then stand back and look at your crowning achievement. Make sure you secure the woodblock to the cabinet first and then nail the crown molding to that.
Pendant light, sconce, drawer pulls, cabinet latch, faucet, paneling, flat crown, paint color the shadow line.
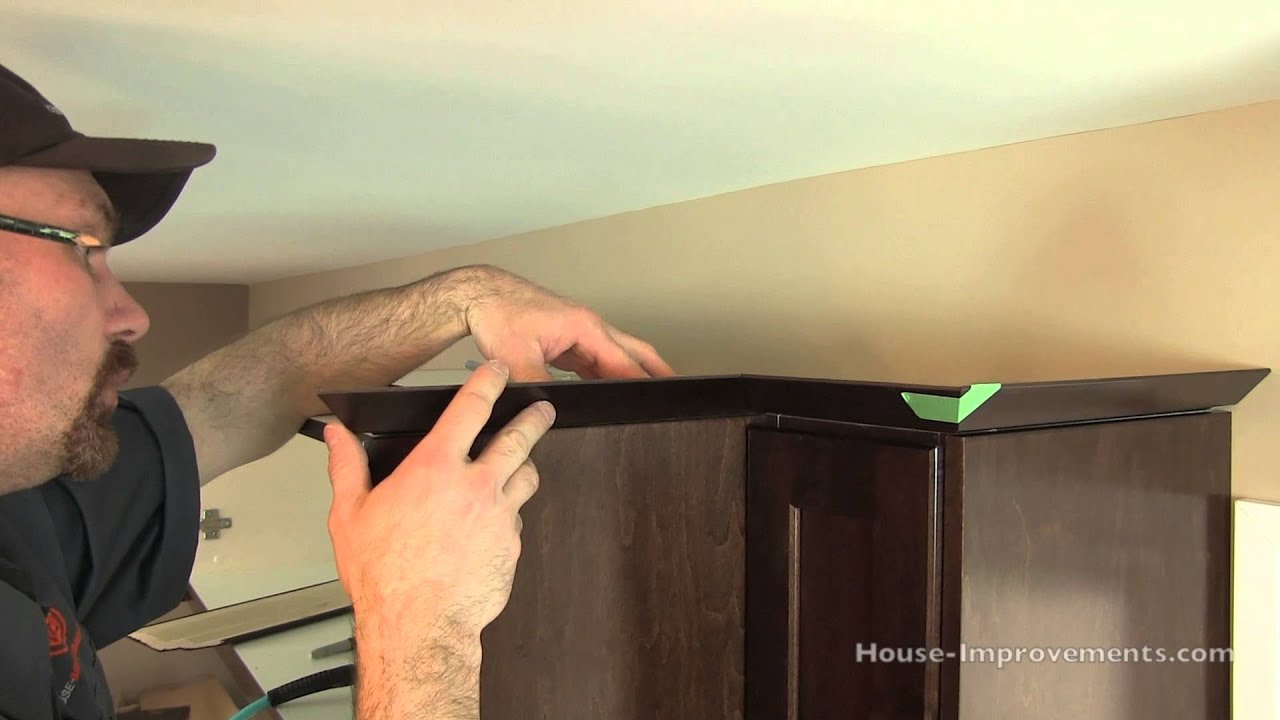
Measure and mark the front section of crown molding to the cabinet width. Once the fit is right, take the molding to the wall. Mark where the crown molding will sit on the cabinet use a straight edge (such as a long level) to mark where the crown molding will sit on the cabinet facing. Ask this old house general contractor tom silva installs crown molding on kitchen cabinets with full overlay doorssubscribe to this old house: Mount the crown molding to the cabinet using the brad nailer. Attach it to the wall. Touch device users, explore by touch or with swipe gestures. Repeat this process with the rest of the cabinets with outside corners. But the bad news is it takes some practice, careful measurements, and perhaps an extra stick or two of crown molding. First, we start with a plain 'ole stock cabinet from home depot. Make sure the pieces are together and in place snugly. Use a pin nailer to nail into the corners of the two pieces of crown molding (image 2). Sometimes a 3/16 cabinet skin is applied to the end;
Crown molding can either bond with the ceiling or allow for space above the cabinet. Mark all sides of the cabinet onto which you will be attaching crown moulding. Secure the crown molding when installing on a wall, use the pneumatic nailer to secure the crown molding at the wall studs. My husband then put a string of rope lights above the cabinet hidden by. You can use 1 x 4 lumber, and rip these into two or three strips.
Install Crown Molding on Kitchen Cabinets | how-tos | DIY from diy.sndimg.com Repeat this process with the rest of the cabinets with outside corners. Cut a scrap of lumber to the correct dimension and draw layout lines on the wall and ceiling. I was having a hard time figuring out how to miter the crown at the funky angles resulting from the weird cabinet shape. And that can make installing crown molding super frustrating. Use a pin nailer to nail into the corners of the two pieces of crown molding (image 2). Mark where the crown molding will sit on the cabinet use a straight edge (such as a long level) to mark where the crown molding will sit on the cabinet facing. But the bad news is it takes some practice, careful measurements, and perhaps an extra stick or two of crown molding. Fill in all the nail holes with wood putty.
Crown molding can either bond with the ceiling or allow for space above the cabinet.
When installing the top of a cabinet, space the finish nails about 12 to 16 inches apart. House flipping brothers dave and rich show how to install kitchen cabinet crown molding and trim with tips.this video covers all aspects of cabinet molding i. Then stand back and look at your crowning achievement. When you install the moulding, align it with the layout lines. Crown molding kitchen cabinet molding cabinet. You can use 1 x 4 lumber, and rip these into two or three strips. Pendant light, sconce, drawer pulls, cabinet latch, faucet, paneling, flat crown, paint color the shadow line. These filler wood pieces should be held with screws on the top of the cabinets. Fill in all the nail holes with wood putty. Dry fit the crown molding by holding the front piece and a side piece against the front and side of the baseboard (image 1). This means that there will be a little sliver of the unpainted piece of wood that will show through once the crown is added. Installing nailer strips start by assessing the cabinets. Fasten the crown molding to the top of the cabinet (we used a brad nailer).
To create this article, volunteer authors worked to edit and improve it over time. Crown molding is decorative trim that is added to the top of your cabinets. You can use 1 x 4 lumber, and rip these into two or three strips. Cut a scrap of lumber to the correct dimension and draw layout lines on the wall and ceiling. The benefit of installing crown molding is that it draws the eye upward, showcasing the elegance of your cabinets.
How To Install Cabinet Crown Molding - YouTube from i.ytimg.com Installing nailer strips start by assessing the cabinets. (use one long strip for a row of cabinets the same depth.) then apply wood glue to each strip, nail it in place, and let dry. Pendant light, sconce, drawer pulls, cabinet latch, faucet, paneling, flat crown, paint color the shadow line. Remember i said i was going to install crown molding on that cabinet to finish the room? Use the caulk gun to cover up any gaps in the joint (make sure you're using paintable caulk). This means that there will be a little sliver of the unpainted piece of wood that will show through once the crown is added. House flipping brothers dave and rich show how to install kitchen cabinet crown molding and trim with tips.this video covers all aspects of cabinet molding i. Nothing is perfectly level and nothing is perfectly square.
Use the caulk gun to cover up any gaps in the joint (make sure you're using paintable caulk).
You can use 1 x 4 lumber, and rip these into two or three strips. If you have high ceilings, we recommend leaving space. This means that there will be a little sliver of the unpainted piece of wood that will show through once the crown is added. You probably forgot about that since it was two years ago. Mount the crown molding to the cabinet using the brad nailer. Attach it to the wall. Cut a scrap of lumber to the correct dimension and draw layout lines on the wall and ceiling. House flipping brothers dave and rich show how to install kitchen cabinet crown molding and trim with tips.this video covers all aspects of cabinet molding i. Titebond no run, no drip wood glue provided by titebond. Crown molding is decorative trim that is added to the top of your cabinets. Mark where the crown molding will sit on the cabinet use a straight edge (such as a long level) to mark where the crown molding will sit on the cabinet facing. Enter the shadow line.holding the crown down below the ceiling a bit (around 1/2) allows you to. For more information, visit www.titebond.com.